Pear Cider (Process and Recipe)
Thursday, October 1st, 2009
So we decided to make hard pear cider (perry, or poiré) this year.
There are some good recipes on the web, but very little documentation on the complete process. Hopefully this log of our process will fill in the gaps for you. Before we begin, here are some of the essentials.
- Type of fruit: Ripe, organic Bartlett pears.
- Amount of fruit: 10lbs of fruit produced 6lbs of cider – 2800ml or about 3qt.
- That’s about: 65-75lb of fruit for 5gallons at full OG.
- However: Full OG was 1.070, so we added water to bring it down to 1.055.
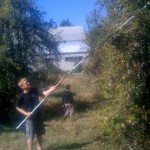 Picking the pears
09-27-2009
Finding cheap pears was more difficult then I originally imagined. We were planning to juice the fruit and thus didn’t really care about it’s appearance. I put an ad on craigslist wanted – asking for anyone who might have a tree around town, so that we might collect the windfalls. There were a few leads, but none of them produced many pears.
So, I started looking at u-pick options. Oregon is a great place to pick fruit, but pears ranged in price from $0.50 to $1.00 a pound and many of the options were 50+ miles away. Then, by chance I found a much more local farm that was offering organic Bartlett pears for only $0.20/lb.
 It is a small farm is called Vancil-Polehn and I found them via this ad. Here is an excerpt: “Organic Bartlett pears .20 per lb for Pears (some have scabs on them that is the reason behind the cheap prices) STILL TASTE WONDERFUL! OPEN FROM 9am-5pm”
They are in located in the Redland/Oregon City area about 17 miles from my house. Much better then heading all the way to Hood River. If you go, make sure to wear shoes and long pants. There are blackberries around many of the trees that want to gobble up your pears. You might also consider bringing your own fruit picking device. We were happy to use the can-on-a-stick that they have available, but it was no the most efficient method.
It took four of us a few short hours to pick 225lbs of pears.
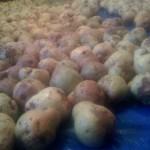 Ripening the fruit
09-27-2009
Much of the fruit was very firm. I decided to lay it out on a tarp in the guest bedroom to ripen. It was set out on Sunday. By Wednesday, all of the pears were yellow and giving off a pleasant aroma. They also started to attract fruit flys.
In hindsight, it may have been better to press the fruit green. Pressing the juice from the ripe/soft flesh ended up being problematic. Skip to “Pressing out the juice” for more details.
Grinding / Chopping / Scratting
09-30-2009
To coax the juice out, you first have to cut it into small pieces (commonly called scratting). Pressing whole pears will just result in frustration. The smaller the pieces, the more efficient your pressing will be.
The options are 1) spend all day chopping by hand, 2) rent an expensive grinder 3) build your own scratter! Guess which one we went with?
Our scratter is a smaller version of this design. It was made using a rolling pin, stainless screws, a rod, some bearings and a 1/2hp motor. The motor was originally 1800rpm – so gearing was added to slow it down to around 850rpm.
As you can see, the scratter makes quick work of the fruit – producing thousand of tiny shreds, ready for pressing. Another advantage is that the screws don’t seem to cut the seeds. This will help keep out the cyanide.
Just note – the motorized version is fun and easy to make. However, it is also very dangerous. If it can grind apples, think what it would do to a finger… Please be safe.
 Pressing out the juice
09-30-2009
Once the pears are shredded, it is time to press out the juice. We were lucky enough to borrow a small press from our friends. Prior to pressing the pears, we did a dry run with a bucket of windfall apples. the press seemed to work quite well.
However, the pears proved to be more difficult.
We placed the pear shreds in a nylon bag (open at the top) inside the press and then applied pressure to the top of the press as we had done with the apples. Unlike the apples the pears seemed to “sauce” and squirt out around the edges of the press top.
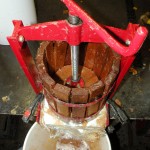 So we tried closing the top and pressing. This worked a little better, but too much pressure would cause the fine nylon bag to burst – sending pear in all directions.
The best method involved squeezing the bag by hand, then applying pressure with the press. It seemed to work well, giving 6lbs (3 quarts) of cider for every 10lbs of fruit – or 60% efficiency. However, it took hours to go through all 175+lbs of pears. The remaining 40% of semi-dry, pear pulp was added to the compost pile.
I now believe that the problem might have been avoided by working with less-ripe fruit. The cells of fully ripe, yellow bartletts seem to hold on to the juice. This probably has to do with how the pectin sets up in ripe cell.
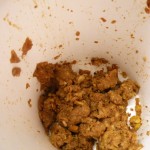 Searching the web, there were several suggestions including: using different mesh bag styles, adding adjuncts like rice hulls and even freezing the fruit. If you have a bunch of ripe pears on hand, please experiment and let us know. As for me, I plan to just juice them earlier next time.
Setting the Cider
09-30-2009
From 165lbs of pears we ended with over 11gallons of raw cider. It seemed a little “gritty” so we strained it through some fine nylon to remove many of the particulates that had come from the pressing process.
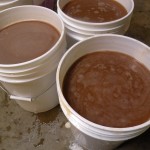 Then we tested the sugar content it with a hydrometer. It turned out to be 1.070, much higher then our recipe called for (1.045). Water was added to bring the OG to about 1.055. This is still a bit higher then our recipe called for, but should give a pleasing amount of alcohol near 5% after fermentation. An important thing to remember is that, unlike apples, pears have some un-fermentable sugars. So keep your OG a little higher then you would with other ciders.
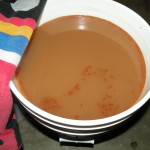
The addition of H20 brought it to about 13 gallons of cider divided between 3 buckets.
Then the chemicals were added. Each bucket received: 5 campden tablets (crushed) to kill the wild yeast, 1/2tsp of yeast nutrient and 3.75tsp of pectic enzyme to help break down all that nasty pectin. This should sit for 12 hours before adding any yeast.
Remember to cover the buckets with a clear towel to keep the creepy-crawlers out.
Fermentation Begins
10-01-2009
One packet of dry Pasteur Champagne yeast is gently sprinkled on top of each bucket. The directions say to ferment at 65-75F, but many sources including wikipedia suggest: ” a temperature of 4–16 °C (40–60 °F). This is low for most kinds of fermentation, but is beneficial for cider as it leads to slower fermentation with less loss of delicate aromas.” So, I wil be leaving these in the basement.
10-02: The next morning shows only minimal signs of yeast growth on the surface. Each container is given a vigorous stir (it’s last) to distribute the yeast.
10-07: For the past 5 days the cider has been really active. You can see the surface churning from all the CO2 that is being produced. However, there is surprisingly little foam (almost none). This is in stark contrast to some apple cider that I had set up a week prior – it produced a head of foam 2-inches thick each morning.
Racking
10-12-2009: Fermentation slowed and the three buckets were racked into two 6 gallon carboys. I left the thick sludge in the buckets, but was not too concerned about picking up sediment. By the next morning you could see a clear line where the sediment had already begun to settle.
Gravity was a surprisingly low 1.010 to 1.012 (depending on bucket). So…
- (1.055-1.011) * 125 = 5.5 % alcohol by volume
The only problem with the high attenuation is that most of the sugars have been converted to alcohol – leaving the cider incredibly dry. At this point, you can barely taste the delicate pear flavors. I suspect that we will want to re-sweeten the cider before bottling. However, flavors change/develop in strange ways during secondary fermentation. So, we will just have to wait and see.
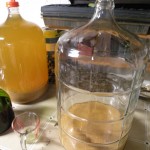
11-08: It has been a month and yeast/pectin has settled quite a bit. Time to rack!
Five  gallons of liquid was siphoned from each bottle and into a fresh clean carboy. This means that there was almost a gallon of trub (dead yeast, pectin and other sediment) that was discarded.
We also mixed in something that many of you might find odd: egg white…
Egg white is a common fining agent in wine. The proteins bond to free-floating particles, weight them down and help them to settle to the bottom.
This results in a clearer, less cloudy liquid. It only takes a little. Separate out the white from the yolk in a clean dish and double with water. Add a small pinch of salt to emulsify and then whisk with a fork. We added just a few table spoons to each batch. Vegans will have to use a different fining agent like bentonite (just not isinglass).
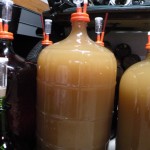
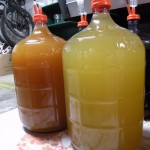
The cider is now a light, cream yellow in color. The bottle in the front of this photo is the pear cider. For comparison, the rear carboy is filled with an apple cider of a similar age. Both ciders are much clearer the a few weeks ago, but still slightly cloudy. The egg should help with that.
Kegging/Bottling
2-20-2010: The cider continued to clear in the carboys for several months. We then racked it into stainless “corny” kegs for carbonation. This could have been done a few months ago, but were in no rush. Before hooking the kegs up to CO2, we added campden (to halt fermentation) and then back-sweetened with fresh pear juice.
6-12-2010: Unfortunatly, none of the cider made it into bottles… It was just that good. We just kept tasting it directly from the keg – then, oops – it was all gone.
The final pear cider was a pale, clear yellow. It had a crisp, though muted, pear-ish flavor.
Overall, it was tasty and refreshing. However, there are a few things that I might do different next time.
Yeast – Although it turned out very well, the final cider lacked a real pear flavor. Even back-sweeting with new cider didn’t fully bring back the delicate flavors associated with Bartlet pears. In part this may have been due to the Champagne yeast. An ale, or cider yeast may have worked better.
More acid – The flavor is also highly dependent on the levels of acid. Apple cider often contains a percentage of crab apple juice. Done right, the acidity makes the apple cider taste more “appley”. I could have easily added citric acid before kegging to help highlight the pear flavors.

bknucks Says:
Awesome blog, Gabe! The process looks so fun, wish I would’ve stopped by on Sunday. And that can on a stick, what technology!
gabrielm Says:
I just found a detailed pear cider document that contradicts some of my assumptions. For instance:
Personally, I found the pulp harder to press after 30 minutes – let alone 24 hours… More experimenting is needed :)
Toni Zernik Says:
we are in the process of making cider we juiced the pears because the press made about an inch of juice in 4 hours.. is juicing the pears ok???
toni
gabrielm Says:
Toni,
Sounds like you encountered the same pressing issues that I did. Were the pears fully ripe, or still green?
As for juicing – it should work very well. My only concern would be to make sure that don’t chop up the seeds in the process. Apple and pear seeds contain trace amounts of cyanide. Not enough to hurt you, but broken seeds can cause an off flavor in the cider.
Toni Says:
Hey Gabriel,
Thanks for the info!!!
We juiced the pears on saturday and put the juice in the containers added the pills 1 per gallon. We did not add yeast because the yeast is in the air??
Now the bottles are in my kitchen making all sorts of noises. I was told to wait a few more days before we stop the yeast.
The pears were ripe and some still green but most soft. We had 4 full pear trees I think something like 400 lbs.
Thanks I will let you know how it tastes..
gabrielm Says:
Toni,
Sounds like it is going well. I find that adding yeast give more consistent results, but natural fermentation it a time-honored method. Do you plan to carbonate, or leave it still?
Tom Says:
Many thanks for posting this – I found it VERY useful ! My Pear Tree has had a Bumper Crop this year, and I thought I would give it a go !!
Cheerz !
Tom from New Zealand.
V. Patrice Says:
My peary is still fermenting after 4 months, secondary.
Don’t know how long it will go on. I used tree ripe pears and juiced them, slicing some to be submerged in muslin bag during primary fermentation. I figured this would contribute to better flavor and color. Does anyone know how long this can go on. I didn’t use any water just juice and a small amount of sugar.
gabrielm Says:
V. Patrice,
If you left the juice at full strength and added sugar, the brew could be closer in strength to wine – which commonly needs many months to fully ferment. This is double true if it is in a cooler location.
You can use chemicals to stop the fermentation at any time. This will leave some sweetness to the cider.
Personally though, I would just leave it be and see what happens. You can always sweeten it later.
V. Patrice Says:
Thanks, I agree, and plan to let it work itself out.
I make my wine grape, blackberry, and hard apple cider the same way. They don’t take as long as this but turn out well. Some friends added grain alcohol to their scuppernong wine to end fermentation. I tasted it before adding the alcohol and after. The wine was light and crisp before but after it lost the clean crisp qualities.
V. Patrice Says:
The peary has stopped fermenting. Bottled and tasted,
will enjoy. One jug had a slight bite. The rest is
smooth and has clean pear taste. The jug with slight bite is ok, just doesnt have flavor as nice as others.
Glad I waited.
V. Patrice Says:
I used a juicer and ripe fruit. This was much less work than a press. Added nothing except a small amount of sugar. Just added sugar to taste. Probably about 1 lb. for 5 gallons of juice.
Christine White Says:
Gabriel,
I’m new to the making of Perry (or peary). I will go with your blog. One thing, is it possible to buy pear juice (sans preservatives or chemicals) and do the same thing (with egg white) to yield a smooth, yellow-golden brew?
Christine
nagmay Says:
Christine,
If the juice is filtered, you may not need the egg whites.
However, if it is fresh pressed, the same fining process should work well.
I realize that I never posted a picture of the final cider. Rest assured, is perfect yellow-gold.
gabriel nagmay (dot com) | Archive » Parkways Cider Says:
[…] 2009, we made separate batches of pear and apple cider. This time around, we just mixed all the fruit together from the start. All of it is organic and […]
spoon Says:
I have a question about the thickness of my perry. I started off by juicing 80 pounds of 2nd pears. Farm varietys, kind of mealy but very sweet. When juiced the pear juice turned a purple color. not cleat or a yellow haze. It was more a Consistancy of pear sauce. I added corn syrup champagne yeast that was a starter. sweet orange peel, brown sugar, to allow the yeast something to eat. I then thought to strain it but it was to pureed to thin out, I then added water, put away at 62 degrees its been a week th air lock isnt bubblig but it has a fermented smell. what do i do to thin it out will it settle or just be a pear mash thanks
nagmay Says:
Spoon,
That is a lot of information – let’s try to break it down:
– When juiced the pear juice turned a purple color. not cleat or a yellow haze.
I wouldn’t worry about the color too much. The juice will often pick up pigment from the skins and oxidization.
– It was more a consistency of pear sauce.
Strange. What did you use to juice it – a press? an electric juicer? You should be OK even if it is thick right now. Try adding some pectic enzyme. This will break up the pectins and allow the solids to separate fully from the juice. It may take a while, but it should eventually clear up. You may also try adding some fining agents in a month or two.
– its been a week the air lock isn’t bubbling
I will assume that your starter was actively bubbling before you added it to the juice. If so, then the main fermentation might have already occurred. My last batch of cider completed most of it’s fermentation in only a couple days.
If, you are worried that the fermentation is stuck – just add some more champagne yeast to the top.
Cheers,
Gabriel
Keren Says:
Hi Gabriel! We were fortunate enough to come upon a glut of pears and I’m wondering if we would still have good results if I steamed the juice out instead of pressing? What do you think? Does it make a difference if it’s raw?
Thanks!
Keren
nagmay Says:
Keren,
I wouldn’t recommend cooking/steaming the fruit. The end result will taste like cooked fruit – rather then a typical cider.
Francesca Says:
I loved the pictures and all the detail but now I have to know.. how did it turn out? Could you do a follow-up post?
thanks
Francesca
nagmay Says:
Francesca,
It turned out great! So good, in fact, that it’s long gone. However, I will go back and updated the “bottling” section.
Josh Says:
I made a very similar Perry last fall. 3 different batches with 3 different yeast strains. The one with the Nottingham yeast was AMAZING! A bit lacking in acid on the back end, but carbonation compensates for that nicely.