Pondering the Gluten Free
Tuesday, January 11th, 2011
Oat Heaven GF Stout (aka ‘The Glütard’)
Inspired by ryanbrews.blogspot.com
- 10# Oat malt (1.5 – 2 L)
- 1.5# Oat malt wet roasted to match Crystal 120 (120 L)
- 1.5# Oat malt dry roasted to match Chocolate Malt (350 L)
- 0.2# Oat malt dry roasted to match Roasted Barley (500-600 L)
- 1.5# Flaked Oats (perhaps more?)
- 1 oz nugget at 60 min
- 1 oz cascade @ 0 min
- Pacman Yeast California Ale Yeast
The grain levels/darkness and hops are comparable to the Shakespeare stout that I have frequently brewed. This will give a good standard to compare.
As for mashing, oats have far less enzymes then modified barley. The enzymes could be added, or you can mash for longer. My plan is to start the 10# base oats with at 125 for 30min, then 152 for 2 hours. Then, add the roasted grains for an additional hour.
Oats? Are they Gluten free?
For a long time, oats were considered a no-no for those with a gluten aversion.
However, modern studies have shown that any gluten can be contributed to contamination during the processing. This means that, at the most, only trace amounts would be present in the beer.
You can source oats that are certified gluten free, but for this experiment I am just going to get the most commonly available varieties.
The people that I am brewing this for want to limit their gluten intake – those with true Celiac Disease would want to be more cautious.
Update: January 20th
It took a while, but I managed to track down the oat malt. Several local shops said they had it, but really they carried “golden naked oats” – which are already toasted.
I finally ordered 15lbs from Midwest Supply. The prices have been set a bit funny though:
- 0.5lb @ $0.65Â = $1.30/lb
- 1.0lb @ $1.65 = $1.65/lb
- 5.0lb @ $8.00 = $1.60/lb
- 10.0lb @ $15.00= $1.50/lb
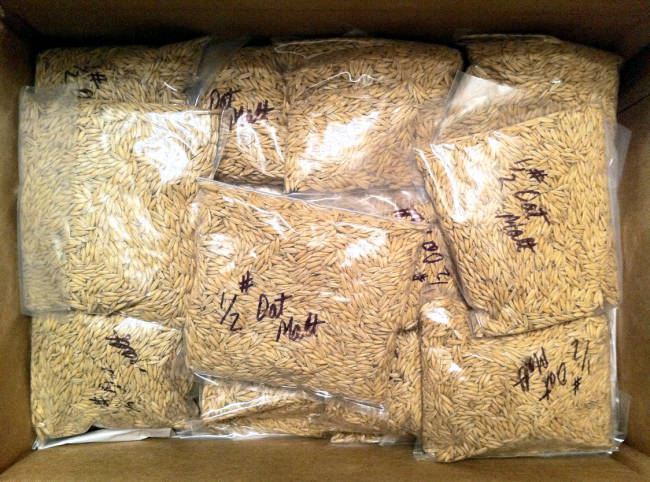
So, I took advantage and ordered 30, 1/2lb bags. Sure enough, that is exactly what showed up at my house a few days later:
Initial Thoughts
This is going to be interesting stuff to work with.
The lovibond color (1.9) and moisture level (3.30%) is comparable to the 2-row that I have been using for a base (1.5 – 2.0, 4.00%). However, the extraction rate is listed as 60%, vs 80% for the 2-row. However, Ryan’s experiment shows that this can be overcome with a 3 hour mash.
I tasted a few kernels. The flavor is good – very malty , with only hints of oat.
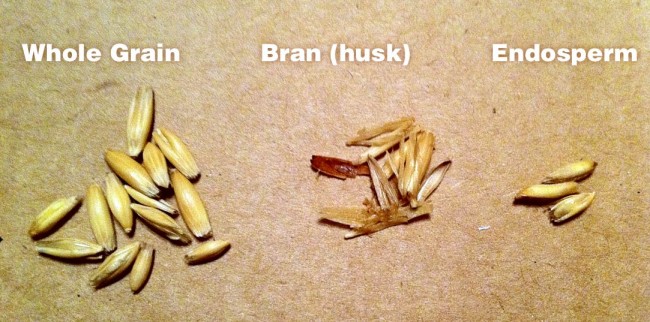
The thickness of the husk did surprise me. Unlike barley, I could not chew the grains whole. The fiberous husk simply shredded and got stuck in my teeth:
Update: January 24th
I stayed up late last night to roast the oat malt. Some basic information on roasting: http://bit.ly/hlvkqi
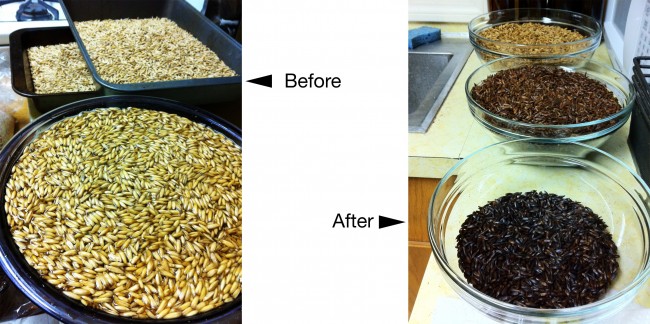
The dry roasting was very straight forward. The oven was set at 400 and we stirred the grain every 5-10 minutes. I lost track of the time, but getting to chocolate took over an hour. We then bumped it up to 450. In about 20 minutes the dark roast color was reached.
Creating the Crystal 120 was a bit more complex. In a large bowl, the oats were soaked for 3+ hours. Then layered in bread pans – about 3 inches thick. I inserted a probe into the grain and maintained a temp just below 160 for about 2 hours. This essentially mashes the endosperm inside the husk. Then, they were spread out on large pans, dried at 250 and finally roasted at 400 for about 40 minutes.
It’s nice to have some corresponding barely malts when comparing the colors.
At the same time as the roasting, I mashed some of the pale oats to create a started for the yeast.
1lb was held about 152 for 3 hours on the stove. It was then strained and boiled. This resulted in 2 liters of wort at 1.040 OG – perfect for a starter.
Update: February 15th
We brewed this up along with a few other batches this weekend.
At the last minute, I decided to pitch a new vial of California Ale Yeast. My packman starter had some trouble and they didn’t have any in stock at the local brew store.
Some notes:
I didn’t stick to a strict mash schedule. We were brewing several other beers, so I left it at 125 for at least an hour and then slowly added hot water to raise it to 150. This created a really thin mash – so after an hour, I pulled 1/3 of the wort, brought it to a boil and simmered it down for a while. It was then added back to the tun bringing the temp up to 153ish. An hour later, we had some mighty tasty wort.
Due to the thin mash, I ended up with 8 gallons pre-boil after sparging. So, we just let boil down for about an hour before adding the 60min hops.
It was a very “by the seat of my pants” brew session, but the results are very promising. 5.5 gallons of a dark brew with an OG of 1.063. It is now fermenting strong, 24 hours after pitching the yeast.
Update: April 15th
Just got around to (yes, 2 months later) transferring to a secondary carboy for some cold conditioning. The brew is still opaque, so a bit of bentonite was added.
To my surprise, the beer does not taste like oats! It will be interesting to do some side-by-side taste tests with the regular Shakespeare.
Update: June 7th
The beer was bottled in early may.
I poured a few glasses for some friends the weekend without mentioning (at first) that it was gluten free. Later, when I told them the recipe, there was a lot of disbelief. “But it’s not thin and cider-y … but, this tastes like a normal stout!”
Side by side with a bottle of Shakespeare stout, I can tell the difference – however, not necessarily in the ways that you would expect. The gluten free is thick and malty, but it does not taste like oats. In fact, the major difference is an increased sweetness to the beer. This may be do to boiling down part of the wort during the mash.
In any case, the experiment was a success and deserves more “research”.


gabriel nagmay (dot com) | Archive » Loop de loop – Imperial Alt Says:
[…] As for the Crystal, I decided to stay up late and roast my own. Notes on home roasting can be found on my Glutard recipe. […]